Our company offers the installation of curtain rods for curtains of various types and guarantees the best quality of services - the curtain rods installed by us will serve you for a long time without causing the slightest concern and without losing their original appearance. When installing cornices, we take into account not only the type of the cornice itself, but also the material of the walls, the estimated load on the cornice and other important parameters - this is the professionalism of our employees. All installation work is carried out as quickly and efficiently as possible - we try to act as carefully as possible, and after the end of the work we take out the trash and waste.
Our advantages include not only the high quality of the work performed, but also the speed of eaves installation, the use of professional equipment of the highest class and the willingness to fulfill orders of any complexity. The cost of our services is very affordable and will surely turn out to be a pleasant surprise for you - we strive to keep the prices for installation of curtain rods fully affordable for customers. You can be sure that the final cost of services will be exactly the same as indicated in the price list - we value the trust of our customers and never disappoint them!
Frequently asked Questions:
When is the installation done?
Delivery and installation is carried out in 1 day at the time agreed with you.
Is there a guarantee for the work performed?
Warranty for work is 1 year.
Is it possible to reduce the size of the cornice in place?
If you decide to reduce the length of the cornice, then our craftsmen can file the cornice in your home (1 washed down 100 rubles).
Is it possible to order installation in the evening or on weekends?
We carry out installation daily from 09.00 to 21.00 hours at an agreed time. Please warn in advance of the presence of a "QUIET HOUR" in your home! It will save your money and our time!
Who does the installation?
Installation is carried out by staff members of our company, trained by leading manufacturers of curtain rods.
Prices for installation of curtains, blinds
| Description | Price |
| Departure to home, office | |
| In case of service provision | is free |
| In case of failure / transfer | 485 RUB |
| Dismantling the curtains | from 146 rub. |
| Installing curtains | from 776 rub. |
| Installation of blinds | from 776 rub. |
| Installation of ceiling cornice for curtains | from 776 rub. |
| Other household services | from 485 rub. |
All masters work under a contract, therefore they are financially responsible for the services provided.
Balashikha professional masters work at the prices of our service, and not at their overpriced
The cost of work is agreed upon at the stage of diagnosis, without coordination work will not begin
We have many masters, so we can solve the problem of the client within 2-3 hours or when it is convenient for him
Customer reviews

Cornice Installation Options
Correct installation of the ceiling cornice will reliably and for a long time withstand the weight of heavy curtains, decorate the interior. Installation of the ceiling cornice is performed in the following options:
- Ceiling mounts
- In the window opening
- In a niche
- To the stretch ceiling
- To the arch
- On the wall using brackets.
Qualified service specialists will help to hang a cornice of any design.
- Eaves for curtains of the hidden installation,
- Round, single row of metal, plastic for light curtains,
- String cornices for curtains with one or more wires,
- Styrofoam cornices
- Plastic, with guide rails in 1, 2 and 3 rows,
- Profile cornices,
- Ceiling cornices made of Europlast polyurethane, decorative wood of any type with a construction inside.
Our craftsmen can simultaneously install blinds on windows.
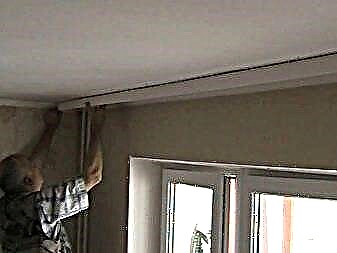
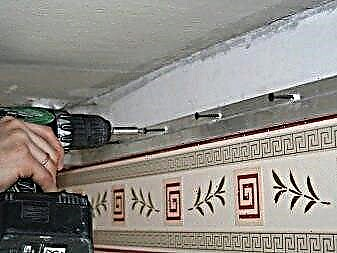
Steps for installing cornices
Leaving for the address, the master brings with him all the necessary tools, fasteners, building materials. Therefore, the installation of curtain rods takes a minimum of time. Before starting the installation, the wizard will check the possibility and safety. Installation of curtains, curtains, curtains, blinds must meet the fire safety conditions.
Next, the installation of the cornice is implemented according to the following scheme:
- Marking mounts,
- Drilling holes,
- Installation of a cornice for the living room, kitchen, etc.
- Securing plugs, lugs, string tension,
- Installation of blinds, hanging tulle, curtains.
How much does it cost to hang a curtain rod
Our masters will calculate the cost of work for free. In the event that the client’s rates are not satisfied, he will have to pay only for the call.
The final price for the service depends on:
- Wall material (concrete, block, brick, wood),
- Ceiling heights
- Mounting points for the cornice - ceiling, wall, window,
- The complexity of the design, length and row,
- Materials spent
- The number of cornices.
Call tel. 8 800 550 1998! The manager will accept the application, agree on a convenient time for the arrival of the master.
Types of window cornices
Modern types of cornices, in addition to performing a functional task, are also an element of decor. The classification of the cornice is carried out on several grounds. These include: type, material used, type of construction, method of attachment.
Any type of cornice, regardless of the material and type of fastening, is divided into single-row, two-row and three-row structures:
- The simplest option is a single-row, designed for one curtain.
- A more common option is a two-row option. This design is designed to hang two types of textile fabrics, most often used dense curtains in combination with light curtains.
- A three-row version is necessary if, in addition to curtains and curtains, a lambrequin is hung out or this design is used to create a multilayer composition of textile fabrics of various densities.
According to the material, the cornices are divided into wooden, metal and plastic (PVC) products:
- Wooden cornices belong to the classic options and are suitable for almost any interior. For their manufacture, deciduous, coniferous and exotic species of trees are used. Any wood material is processed by special means, thanks to which the processes of decay are not terrible for the finished product. Treated cornices have strength and durability. As a rule, wooden types of products are rod types.
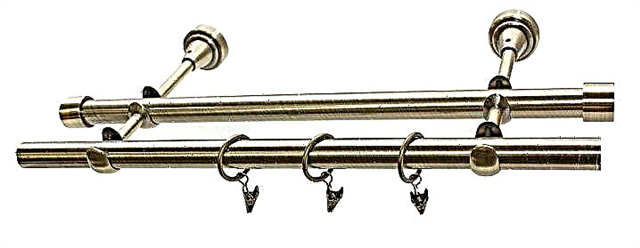
- Metal cornices no less popular. Their design can be made of aluminum, stainless steel, brass, chromium, nickel, iron and copper. Metal products can have various shapes. The classic options include rod models, consisting of one or more pipes with a circular cross section and two or three brackets necessary for fixing the base.
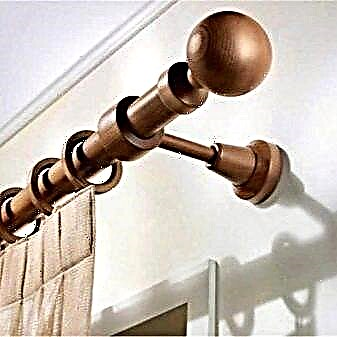

Manufacturers produce various types of rods. Their surface can have a smooth surface, and can be decorated with various ornate patterns of various shapes. Very often, the ends of the rod cornices are decorated with tips, which have not only a variety of shapes, but can also be made of a variety of materials.
More modern models include tubular metal profile cornices. They are based on round or rectangular pipes. Rail mechanisms, consisting of two or more grooves, are tracks along which the hooks move.

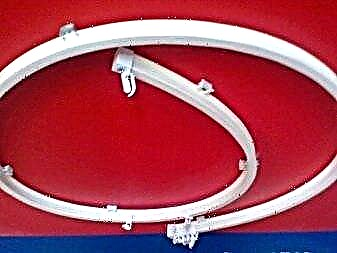
Against the background of classic metal models stand out flexible corniceswhich can be made of aluminum or plastic. They, as a rule, are used not only for decoration of windows with uneven outlines, but also various openings are decorated with their help. Flexible options without exaggeration can be attributed to universal models.
Due to their plastic construction, they can be installed not only in rooms with a favorable microclimate, but also in rooms with high humidity, which include bathrooms.

A variety of metal bar eaves are mini options. The design of these models consists of a single rod and two brackets. The principal difference of this type is the presence of a sliding mechanism in the bar. Thanks to such a telescopic device, it is possible to change the length of the product, depending on the width of the window opening. The length of the rod, depending on the model, varies between 40-135 cm. Using universal mini-options, you can decorate not only the window opening, but also a niche, doorway.
Tire profile cornice has a rectangular shape. Any model of this type is equipped with two rotary elements, thanks to which the curtains beautifully diverge on different sides, forming an elegant semicircle. Very often, the tire option is decorated with a baguette strip, which is inserted into a special groove. A baguette cornice looks very organic. The strip itself hides the hooks, a feeling of soaring curtains is created, especially if the color of the strip matches the tone of the ceiling.
Plastic models They are a variety of profile options, have light weight, attractive appearance and affordable price. In shape, they resemble a flat profile (tire) with 2, 3, and sometimes 4 grooves for hooks. The bus or rack version is usually mounted on the ceiling.


Necessary tools
To install any model of the cornice, a certain set of tools is required, without them high-quality installation will be impossible. As a rule, manufacturers supply each product with a special set of fasteners that will be needed during installation. But additional fasteners will never be superfluous, since during the installation process sudden breakdowns of fasteners are possible.


In order to hang a cornice, it is necessary to rise to a certain height. This can be done with the help of a stepladder. The puncher is the main tool, without it you cannot drill holes, especially if the wall is concrete. A tape measure and a pencil will be needed to mark the holes. Dowels are used as the basis for self-tapping screws, they are necessary for more durable mounting of the structure. For a smooth installation of the cornice, you need a building level, with it you can hang the selected model as accurately as possible.
Rules for preparing for installation
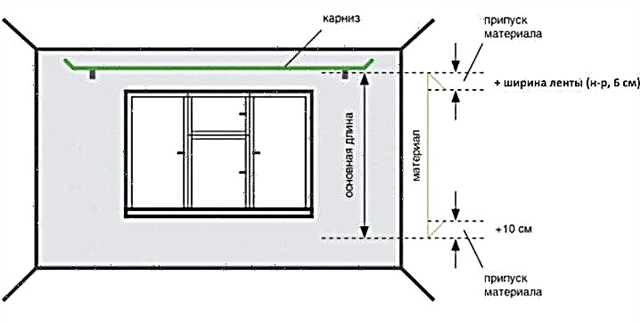
In order to correctly install any model of the cornice, you must first conduct a series of preparatory measurements and only then acquire the desired design:
- First, measure the width of the wall and window opening. As a rule, the cornice should be larger than the width of the window opening. The minimum margin on each side varies between 15-25 cm. Thanks to this margin, the curtains will not block the window opening when opened.
- Sometimes cornices are installed from wall to wall. With this installation, you need to leave a few centimeters for the decorative elements of the products (tips).
- With proper installation, the protruding part of the window sill and heating system must be taken into account. The minimum distance from the wall to the arm of the bracket should be at least 15 cm. This stock ensures a smooth location of the curtain, it will not lie on the protruding part of the window sill.

How to assemble?
In order to properly assemble the cornice, it is necessary to take into account the design features.
Each model has its own build nuances:
- Before assembling the wall-mounted rod cornice, it is necessary to first determine the required rod length. An ordinary bar, if necessary, is cut to the desired length. The sliding variant extends to a certain length.
- Then you need to prepare mounts for curtains. As a rule, rings with hooks are used as fasteners, which are strung on the bar in the right amount. One ring should be between the cap and the bracket, due to this arrangement of the curtain will not slip to the center. If two brackets are used, then all rings can be put on at once, if three brackets are used, then half of the total quantity is better. After the rings are on the bar, you can put a cap.
- Now you can begin to fix the rod to the bracket. First, on the one hand, and then on the other, the bar is tightly fixed with self-tapping screws.
- If there are several rows, the process is repeated in a similar way. After that, you can attach the bracket with the structure to the wall.


At what height should I mount?
The choice of height is of great importance when installing wall-mounted cornices. The visual perception of the interior as a whole depends on how high the structure is fixed. The higher the installation, the larger and more spacious the room appears. This statement is especially true for rooms with a small area and low ceilings.
The mounting height of the structure also depends on the length of the curtains. The minimum gap between the window and the rod of the cornice should be at least 5 cm. Determining the level of suspension of the cornice depends on the method of fastening the paintings. If the grommets are chosen as the fastener for the curtains, you must leave a minimum gap between the bar and the ceiling (5-7 cm). This must be done for the free movement of curtains equipped with grommets.
How to hang wall models correctly and evenly?
Most often, round tubular and string cornices are hung on the wall.
Operating procedure:
- In order for the wall structure to hang evenly, it is necessary to make markings for the brackets on the wall. For a model less than 2.4 m in length, two brackets are enough, and for longer structures, you need to install a third bracket, placing it in the center.
- For proper marking, first you need to put 15-25 cm on each side of the window opening and draw a straight line with a pencil perpendicular to the ceiling.
- Then, from the middle of the upper part of the window opening, we postpone the desired value and put a point.
- From it we draw a line with the help of a building level and a ruler until it intersects with the side lines. The intersection points of the two lines are places for mounting brackets.
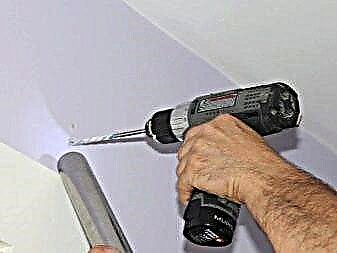
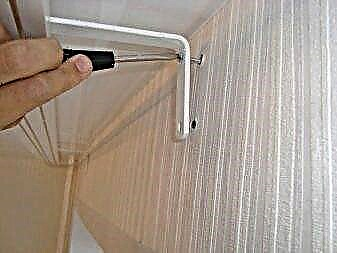
- Now we apply the bracket fastener to the wall and make marks for the holes.
- Using a punch, drill holes and insert dowels. After installing the dowels, you can fix the mounting element of the bracket and hang the cornice.

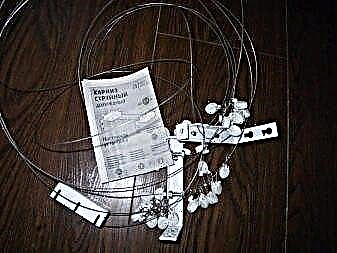
The string cornice consists of one or two strings, brackets and boxes, with the help of which the tension of the strings occurs. After marking and fixing the bases of the brackets, you can begin to tension the string.
- One end of the string is passed through a hole in the mount and secured with screws. Then the bracket is screwed to the base on the wall. Similarly, the string is fixed on the other side and attached to the base. After installation, a final adjustment is made.
- In order to tighten the string of the old model, it is necessary to open the box to find the bolt and using special tools to tighten the washer on the bolt on each side.

Mounting ceiling models and installing plugs
After trimming the profile to the required length, holes are drilled in it every 50-60 cm. Then it is applied to the ceiling, having previously retreated 10-15 cm from the wall in order to make marks. A smaller drill drills a hole in the center into which to insert the dowel. After that, you can attach the profile to the ceiling and fasten using a central screw.
After that, the profile is aligned in the desired position, and the remaining markings are made. Now you can drill the remaining holes and insert the dowels. We fix the finished structure with hooks and plugs inserted on both sides on the ceiling using self-tapping screws.

We establish a cornice on a bay window
For bay windows it is better to use flexible cornices mounted on the ceiling:
- Before installation, the profile must be turned out. To do this, hold the end of the profile with one hand, and hold it with the other hand, bending it in the opposite direction. For better adjustment, these steps need to be repeated 2-3 times. After that, you can make markings for the brackets, stepping back from the wall by the desired amount.
- Brackets must be attached at two points. The distance between the brackets should be within 35-40 cm, this is necessary for a more even fixation of the profile. To form the corners, it is necessary to place the brackets at a distance of 6-8 cm from the corner.
The shape of the cornice must be given on the floor, and a small adjustment can be carried out directly on the spot.
- We fix the finished cornice to the brackets, install the plugs and attach the hooks.


How to fix on drywall and on plastic panels?
In order to install the cornice on a drywall surface, you need to stock up on special mountings. Reliable fixation of the design will provide a dowel-butterfly. When they are screwed in, the expansion lateral planes are revealed, due to which the adhesion to the surface of the drywall becomes more durable.

Installation in cavities of a stretch ceiling
To hang the cornice in the cavity of the stretch ceiling, you must first install the beam. It should be the same size as the selected model of the cornice, but slightly less than the level of the stretch ceiling. The bar is attached to the ceiling surface with dowels.
After the canvas is stretched, it is necessary to make marks and install special rings to prevent the canvas from breaking. After this, the holes are carefully burned and proceed with the installation of the cornice.


Curtain Mount
There are different types of curtain mounts, which are selected depending on the design of the model, fabric density and design ideas:
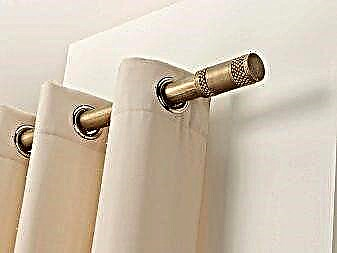
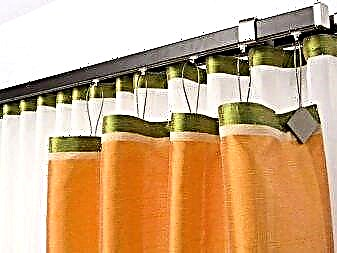
- The most traditional and familiar are hooksmade of durable flexible plastic. Today there are a huge number of them. With their help, you can hang curtains in various ways. There are models that are attached to the curtain tape at one end and inserted into the groove of the profile design with the other. Bar models have a slightly different mount. At one end, the hook connects to the ring, which is worn on the bar, and the other to the curtain tape.
- Unlike hooks, clothespins hold the curtain with the help of teeth, providing a tight grip with the canvas. They are attached to the cornice with the help of rings.
- Curtains can also be attached with eyelets, loops, ties and drawstring.
Beautiful ideas in the interior
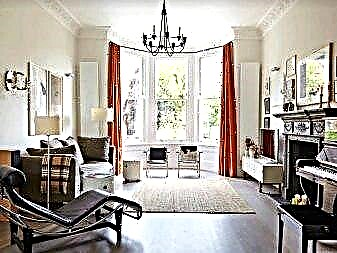
The cornice in any room can be both an accent-making detail and an imperceptible element of the interior.
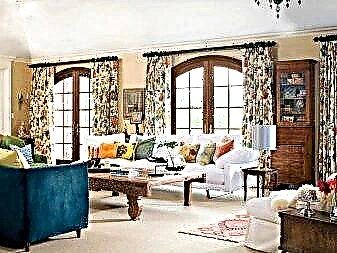
In the living room, any version of the eaves will be appropriate. His choice depends on the size of the room, the shape of the windows, the style of design and the taste preferences of the owners. Framing moldings are suitable for classic interiors. Barbell fit almost any style. Flexible will be appropriate in a living room with bay windows.

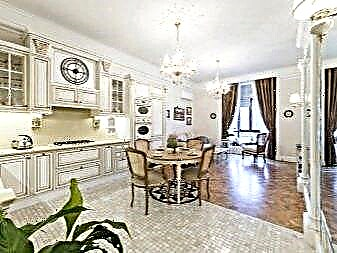
In the kitchen, metal tubular cornices with various fastening of curtains will look great. Their length depends on the size and shape of the window.

On a balcony or loggia flexible aluminum or plastic cornices will look good. But sliding mini-cornices are also a good option for these small spaces.

About how to install a curtain rod for curtains - the next video.
Ceiling cornice installation
Depending on the layout of the room and the wishes of the client, we install ceiling cornices with mounts in various places:
- to the ceiling
- in the window opening
- in a niche
- to the wall on special brackets.
The company's masters install ceiling cornices of all designs:
- single-row (for tulle or curtains),
- double row (for tulle and curtains),
- three-row (for tulle, curtains and lambrequin).
 The company's employees provide not only the reliability and safety of the installed structure, but also a harmonious combination of the cornice and curtains with the interior of the room.
Installation of cornices
The list of installation works for the cornice depends on its design and type. We install cornices:
When installing the curtain rods, the wizards take into account the general requirements:
- on the sides of the window opening, the cornice should protrude at the same distance,
- the cornice should not interfere with the closing or opening of the balcony door or window,
- the curtain should not lie on the windowsill and touch the heating pipes.
Installation of curtain rods
During the installation of curtain rods for curtains, company employees perform the following operations:
- assembly,
- wall marking for fasteners,
- drilling holes for fasteners,
- mounting,
- installation of caps or tips,
- hanging curtains.
This procedure ensures the quality and reliability of the installation of curtain rods for curtains of any type and design.
How much does it cost to install a curtain rod
The price of installing a curtain rod for curtains is calculated in each case individually and depends on:
- scope of work
- lengths and rows
- material and type of walls,
- mounting method
- used materials and tools.
The cost of installation starts at 350 rubles. The exact prices will be announced to you by the master when leaving the facility.
The company "Home Masters" in Balashikha will provide high-quality installation of all types of curtain rods for curtains at a low price. To leave a request, call +7 (499) 394-66-58.